Creating Mapped Drives with Group Policy and Intune
Group Policy admins have been mapping drives for years, while trying to map network drives using an MDM has proved challenging. The good news is that you can use both Group Policy Preferences and Microsoft Intune to map network drives for your users. Its just a lot easier with Group Policy.
Mapping Drives with Group Policy Preferences
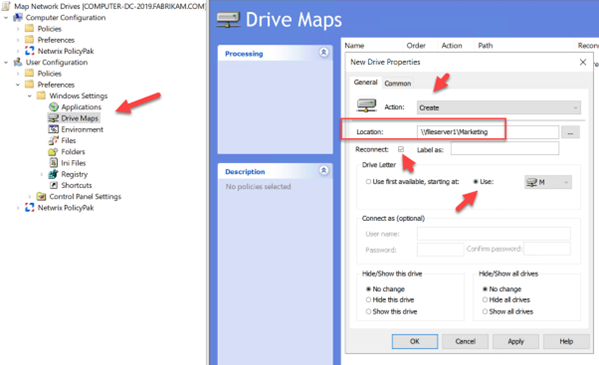
Let’s start with Group Policy. Create a GPO using the Group Policy Management Console and go to User Configuration > Preferences> Windows Settings > Drive Maps. As this is a brand-new mapping I will select Create as the Action. Then type in the UNC path of the shared folder you want users to access. Check the Reconnect box to make it a persistent connection that will appear every time they log on. Under Drive Letter, I assigned a specific drive letter as shown below.
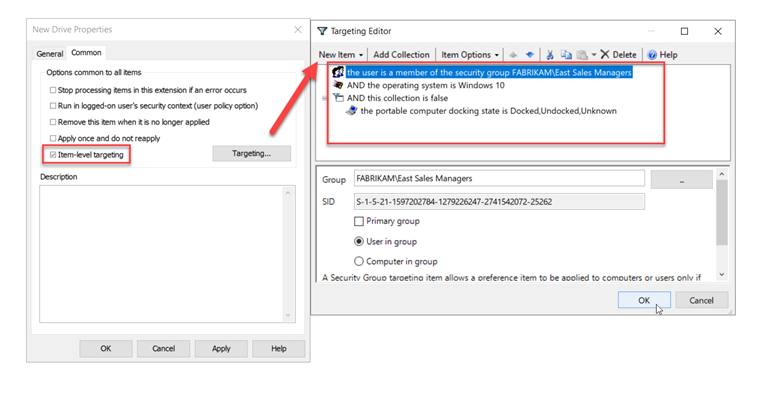
Because I am using Group Policy Preferences I can take advantage of Item-level Targeting to target the GPO more specifically at the exact users I want. Item-level Targeting is a feature not available in traditional Group Policy or Intune. In this case I want to target it to members of the managers group, but only have the mapping applied to desktop computers running Windows 10. The screenshot below shows how I did this after clicking on the Common tab.
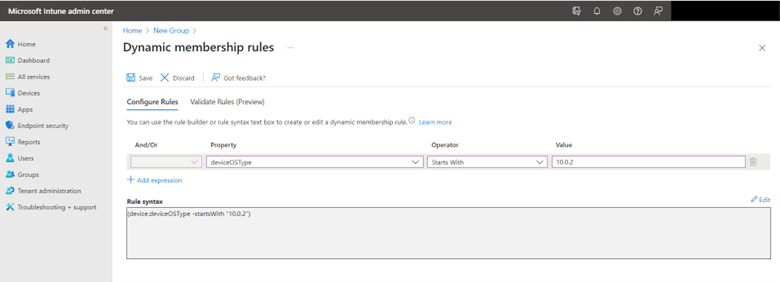
Mapping Network Drives with Intune
For users who solely use their laptops for mobile or remote functions, mapping a network drive to a laptop managed by an MDM may not be logical. However, if all your computers are joined to Azure Domain and you wish to map drives, Intune doesn't provide a straightforward menu-driven method. You'll need to rely on PowerShell. Begin by creating a PowerShell cmdlet, structured as follows:
New-PSDrive -Name "M" -PSProvider FileSystem -Root "ADDRESSOFTHEFILESHARE" -Persist
In this instance, the cmdlet looks like this:
New-PSDrive -Name "M" -PSProvider FileSystem -Root “\\Fileserver1\Marketing” -Persist
BTW – If you wanted to use PS to map a local drive, it would look like the following:
New-PSDrive -Name "Document" -PSProvider "FileSystem" -Root "C:\Users\susan\Documents"
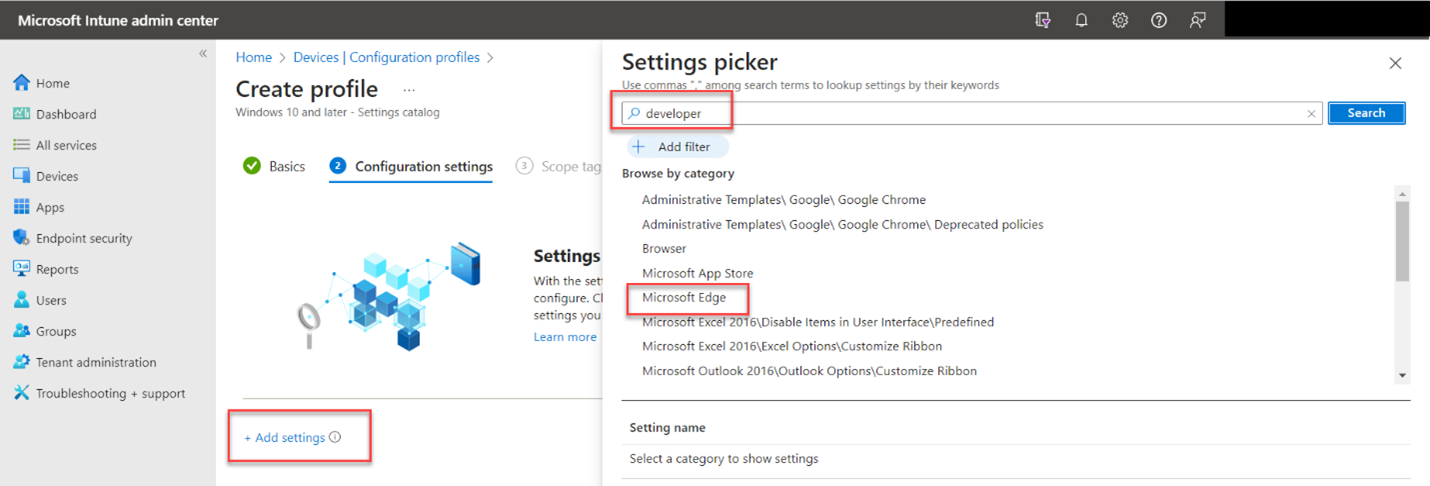
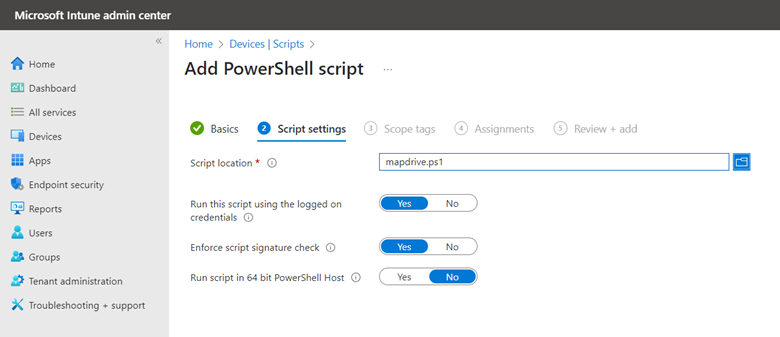
Save your PS script and now go to the Microsoft Intune Admin Center. Go to Devices > Scripts and Add a Windows 10 Script. Name the script and then configure the following settings as shown in the screenshot below.
Then assign the script to the designated users and finish out the wizard. For those who don’t want to use PowerShell, there are third-party solutions out there such as custom ADMX templates that you can download and then import into Intune