6 Essential One Drive Settings in Intune and Group Policy
There are a few key items you'll likely want to tune in OneDrive settings before setting it loose in your environment. As such. Microsoft gives you the ability to manage Intune settings in both Group Policy and Intune. Those settings are:
- Prompt users when they delete multiple OneDrive files on their local computer
- Warn users who are low on disk space
- Silently sign in users to the OneDrive sync app with their Windows credentials
- Use OneDrive Files On-Demand and Coauthor and share in Office desktop apps (User).
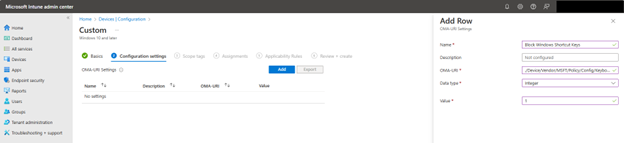
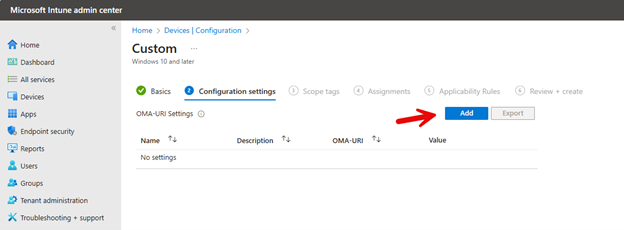
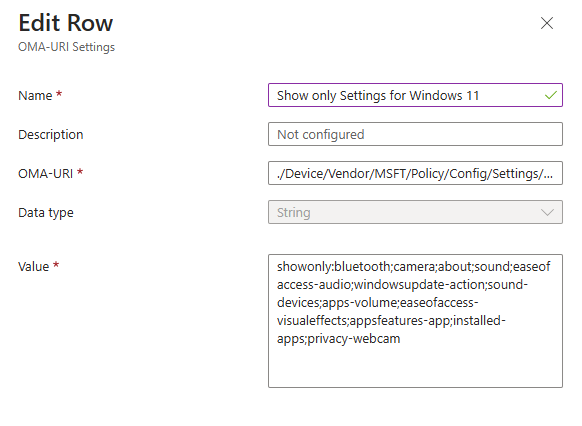
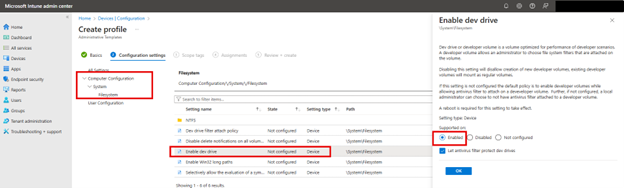
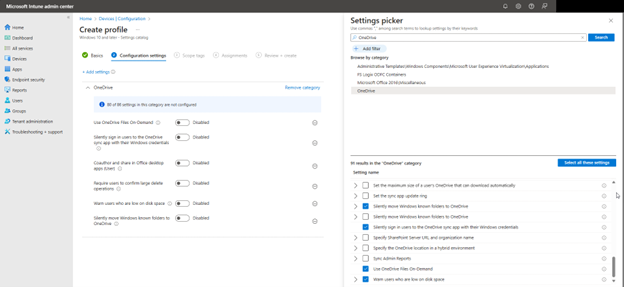
To configure OneDrive settings using the Microsoft Intune Admin Center., navigate to Devices > Configuration > Create New Policy in the Microsoft Intune Admin Center. When creating the policy, select "Windows 10 and later" as the Platform and "Settings catalog" as the Profile type. After naming the policy, type "OneDrive" into the Settings picker and select the OneDrive options. You can then choose which of the settings you want to include in the policy as shown in the screenshot below. In this example, I have chosen six settings that serve important functions in OneDrive.
- Prompt users when they delete multiple OneDrive files on their local computer
This is a data protection feature designed to prevent unintended bulk file deletions in OneDrive. When enabled, this setting triggers a warning prompt if a user attempts to delete multiple OneDrive files simultaneously. If a user tries to delete a large number of files larger at once that is larger than the configured threshold, they will see a pop-up message asking them to confirm the deletion action. The setting includes a configurable threshold that you can set to trigger the prompt as shown in the screenshot below.

2. Warn users who are low on disk space
This setting monitors the local disk space on a user's device to prevent them from unexpectedly running out of storage, which could impact their ability to sync OneDrive files. It includes a configurable threshold, specified in GB, that triggers a warning notification to users when their available disk space falls below this set level as shown here below:

3. Silently sign in users to the OneDrive sync app with their Windows credentials
When enabled, this setting automatically authenticates users with their existing Windows login information to ensure a seamless Single Sign-On (SSO) experience, thus eliminating the need for manual credential entry.
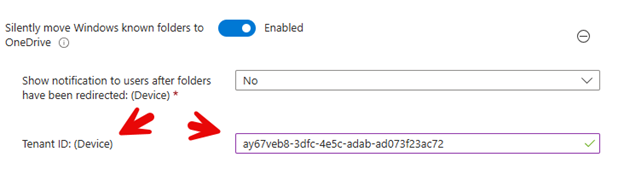
4. Silently move Windows known folders to OneDrive
When enabled, this setting automatically redirects a user’s Windows known folders (such as Documents, Pictures, and Desktop) to OneDrive without user intervention. This aids in ensuring that important files are automatically backed up to the cloud by moving the contents of these folders to OneDrive. Once enabled, you must provide your tenant ID as shown below.
5. Use OneDrive Files On-Demand
When enabled, this setting allows users to see and interact with all their OneDrive files in File Explorer without downloading them all to their device. Files are downloaded only when opened, which saves local disk space. Users can choose to make specific files or folders always available offline.
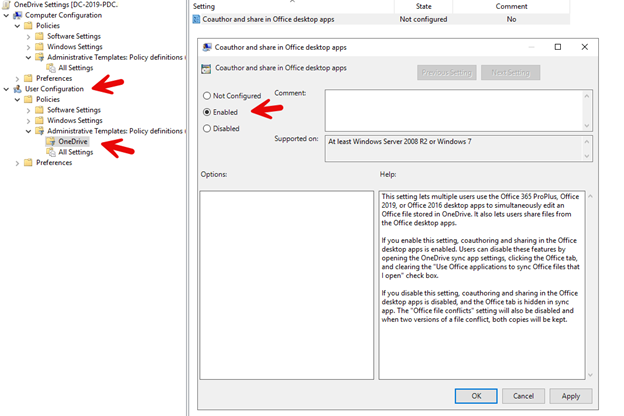
6. Coauthor and share in Office desktop apps (User)
When enabled, this setting allows users to simultaneously work on the same document with colleagues, allowing users to edit them and see each other’s changes in real-time.
Using Group Policy
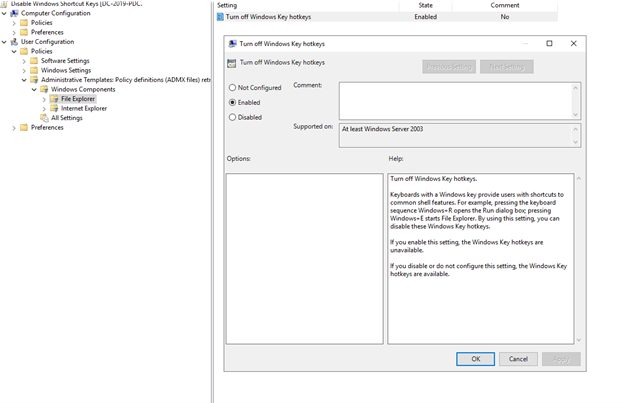
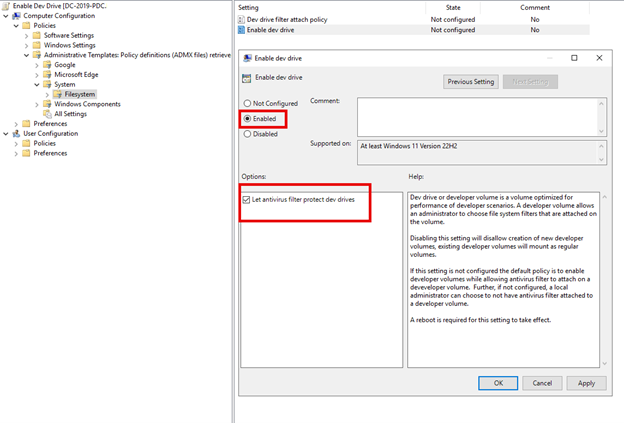
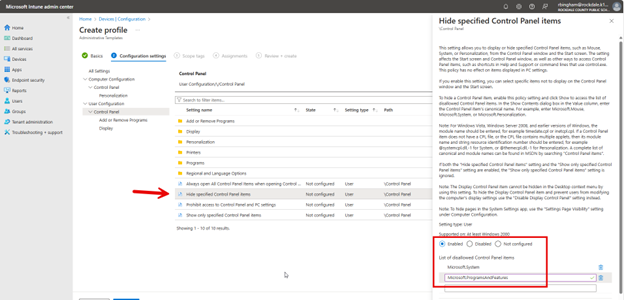
You can also manage these settings using Group Policy. Five of the above settings are from the computer side. Navigate to Computer Configuration > Administrative Templates > OneDrive and enable any of the five settings shown in the screenshot below. Here, I have highlighted the “Prompt users when they delete multiple OneDrive files on their local computer” setting.

The remaining setting, “Coauthor and share in Office desktop apps (User)” is a user side setting. Navigate to User Configuration > Administrative Templates >OneDrive and enable the setting as shown in the screenshot below.
The remaining setting, “Coauthor and share in Office desktop apps (User)” is a user side setting. Navigate to User Configuration > Administrative Templates >OneDrive and enable the setting as shown in the screenshot below.