

Simple Policy Assignments with Azure Dynamic Groups
If you have ever worked with Window Group Policy, you may have used WMI filtering to target the application of your GPOs to a specific set of computers or users based on their characteristics. You could for instance create a WMI filter to apply a policy only to computers running a specific version of Windows or systems with a set amount of RAM or IP subnet.
Microsoft Intune doesn’t utilize WMI filtering but it does use Azure Dynamic Groups which has a similar outcome. Dynamic groups automatically manage group membership based on user or device attributes in Azure AD. The membership of a dynamic will automatically update when the designated attributes of a device or user change. Automated group management relieves administrators from the task of manually adding or removing users or devices from groups as their attributes change. Imagine if your company had a lot of employee turnover or recently implemented a laptop refresh? Dynamic groups can then be used to assign policies to a set of users or devices.
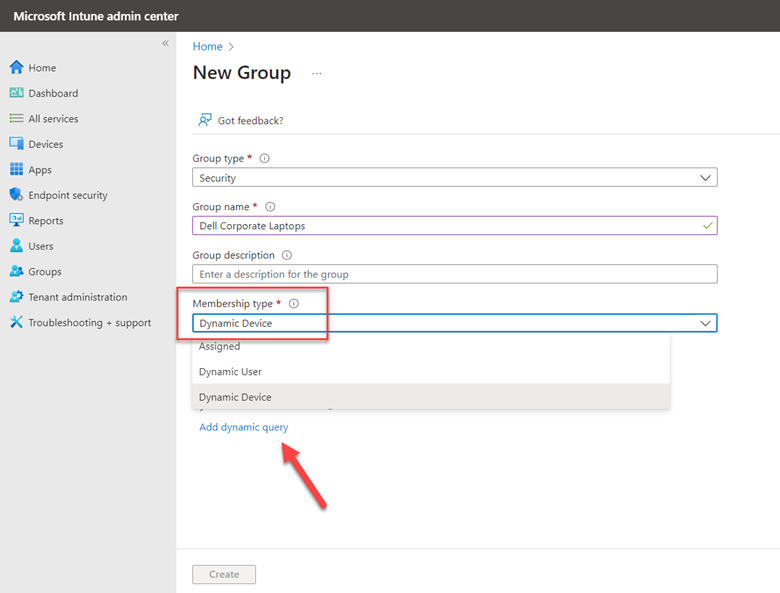
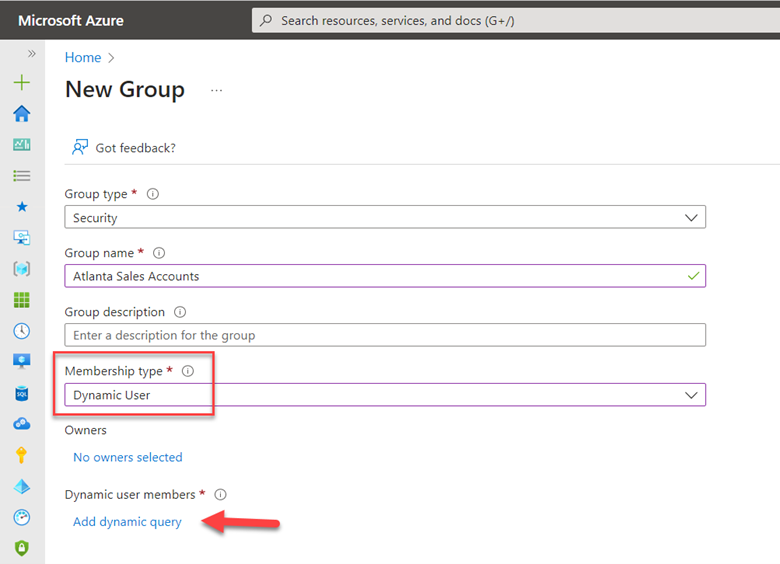
Let’s start with a basic example. Let’s say you manage a fleet of corporate laptops running either Windows 10 or Windows 11 and you want to create policies that will specifically target each operating system. To create a Windows 11 dynamic group, use the Microsoft Intune admin center and go to Groups and click on New Group. Select “Security” as the Group type, give a group name and optional description and select Dynamic Device as the Membership type as shown in the screenshot below. Then click Add dynamic query.
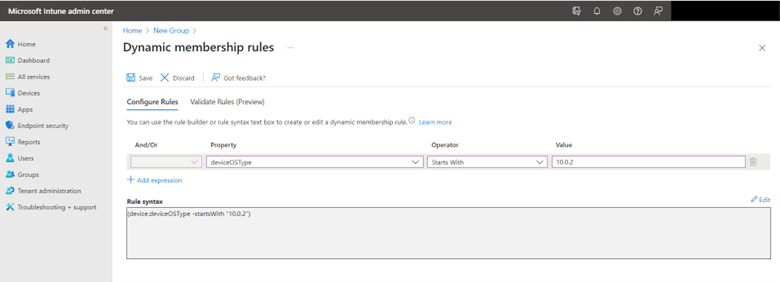
Here you will add the expression(s) that will govern the group’s membership. As shown in the screenshot below, I selected “deviceOSType” as the Property, “Starts With” as the Operator and typed 10.0.2 as the value. Notice that the input values automatically appeared in the Rule syntax underneath.
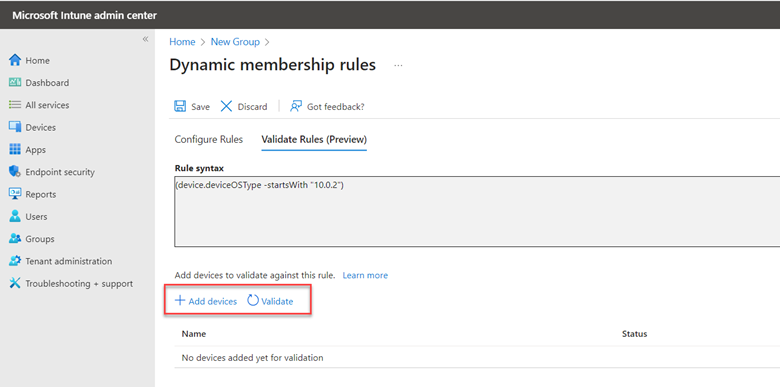
Before clicking Save to create the group, you can first validate the rule(s) to ensure that they will apply the desired result. Copy the Rule syntax and click on “Validate Rules.” Paste the text into the Rules syntax box and select a device to run the validation with.
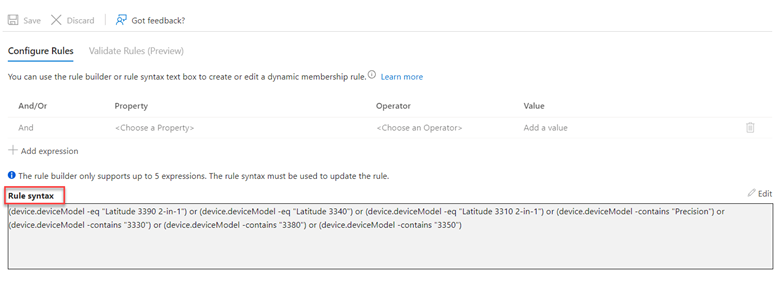
Once validated and saved, you can apply configuration policies to the new dynamic group. Let’s do another example where I want to create a dynamic group for three models of Dell laptops. In the example below I chose “deviceModel” from the Property drop down menu as well as the “Contains” Operator and then made an expression for each Dell model as shown below.
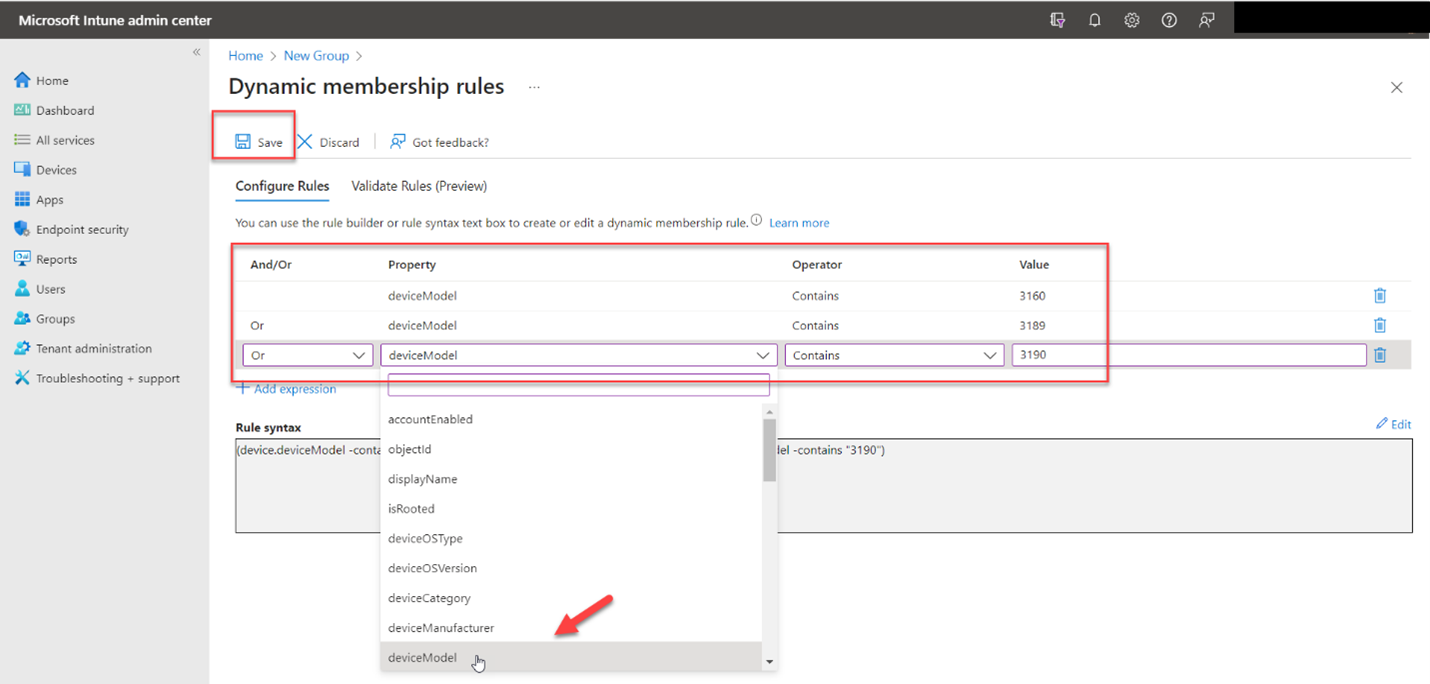
Note that you cannot add more than 5 expressions using the rule builder. If you need to work with more than 5 expressions, you need to add them directly into the rule syntax box. Here is an example below in which the rule builder is no longer available to edit the rule.
You can create dynamic groups for users as well. Simply create a new group and select “Dynamic User” as the Membership type and click “Add dynamic query” as shown below.
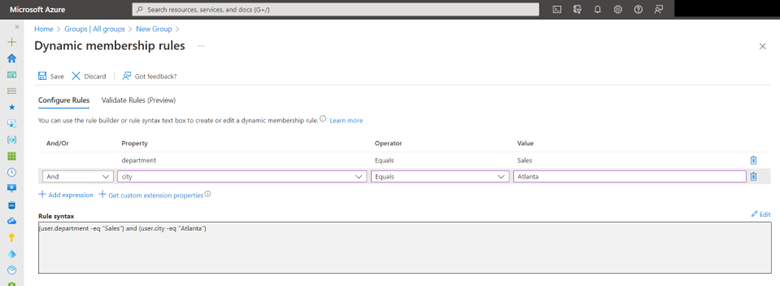
Here you will see a separate set of properties available for users. In the example below I chose “department” and “city” as the two Property attributes and assigned them values so that only salespeople in the Atlanta office will be added to the group. Should someone be transferred to a different office, that account will be automatically removed from the group.
As you can see, dynamic groups can simply group management in large dynamic organizations. They are a great way to ensure that policies, access rights and licenses are delivered according to real-time user and device attributes.

Comments (0)