

How to Kill PUA on your Windows 10 Devices using Group Policy, Powershell and Intune
Few things in this world are black and white and that includes software you download.
There is a lot of "gray-ish" stuff residing on computers today. A good example is software that comes bundled with the computer or was installed by another software application of a different vendor.
Most of the time these applications aren’t something you want in the first place. Other examples include advertising software or evasion software that actively tries to dodge the detection of your cybersecurity tools. While these software files may not pose a direct threat to your computer in the same way that malware, Trojans and other types of malicious software do, these unwanted applications can impede the performance of your endpoints. These unwanted software servings are referred to as Potentially Unwanted Applications (PUA). A PUA is an application that has a poor reputation. These applications can serve as a time consuming distraction of cleaning up these files. Over time, these applications can increase the risk to your network.
Windows 10 Defends Against PUAs
Windows 10 (Professional and Enterprise editions) can detect and block possibly harmful third party and unwanted applications using Windows Defender and does so without requiring Defender ATP or Enterprise licenses. When activated, the PUA security feature looks for certain file structures and conditions that include the following:
- The file is being scanned from the browser
- The file is in a folder with "downloads" in the path
- The file is in a folder with "temp" in the path
- The file is on the user's desktop
- The file does not meet one of these conditions and is not under %programfiles%, %appdata% or %windows%
Should these conditions be met, the file in question is then quarantined and not allowed to be installed until approved.
Using PowerShell to Enable PUA
You can use PowerShell to enable PUA within Windows Defender.
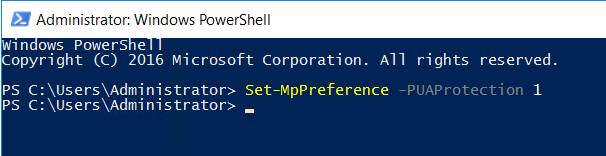
The command options are as follows:
Set-MpPreference -PUAProtection Enabled
Set-MpPreference -PUAProtection AudiMode
The PS command will add and modify the DWORD value in the protected registry key as is shown below.
HKEY_LOCAL_MACHINE\SOFTWARE\ Microsoft\Windows Defender\MpEngine\MpEnablePus.
And assigns one of the following values.
- Disabled: 0 (Does not block PUAs)
- Enabled: 1 (Blocks PUAs)
- Audit Mode: 2 (PUA events are reported in Windows Event Viewer. PUAs will not be blocked however)
Of course, you can make the changes directly in the registry itself.
The end result is as follows:

Enabling PUA with Group Policy
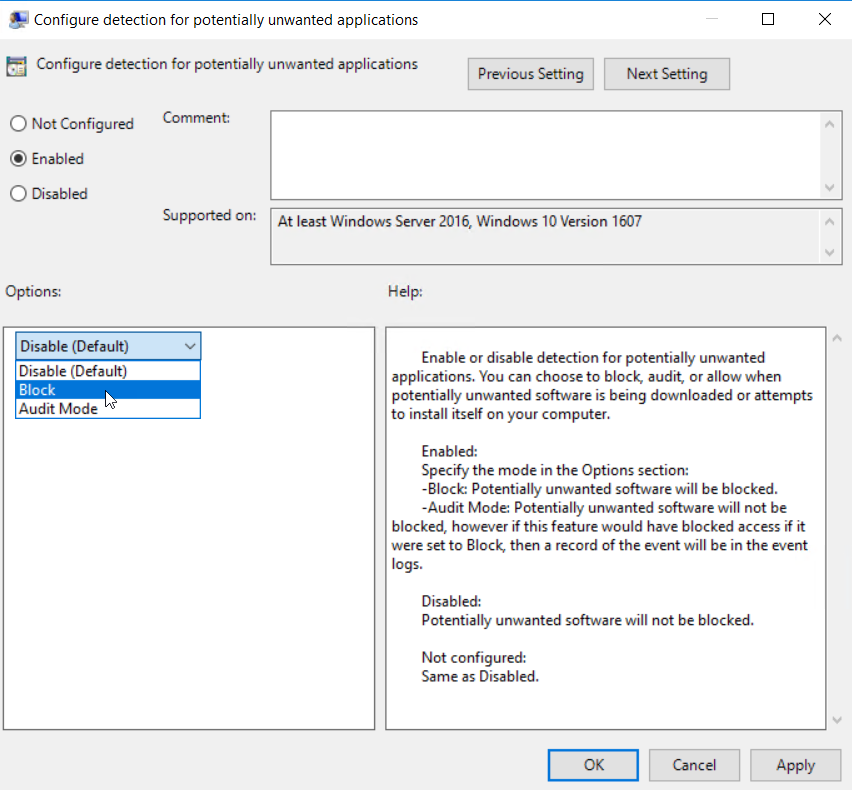
For domain-joined machines, you can enable PUA protection through Group Policy. Simply create a GPO and go to Computer Configuration > Administrative Templates > Windows Defender Antivirus and enable “Configure protection for potentially unwanted applications.”
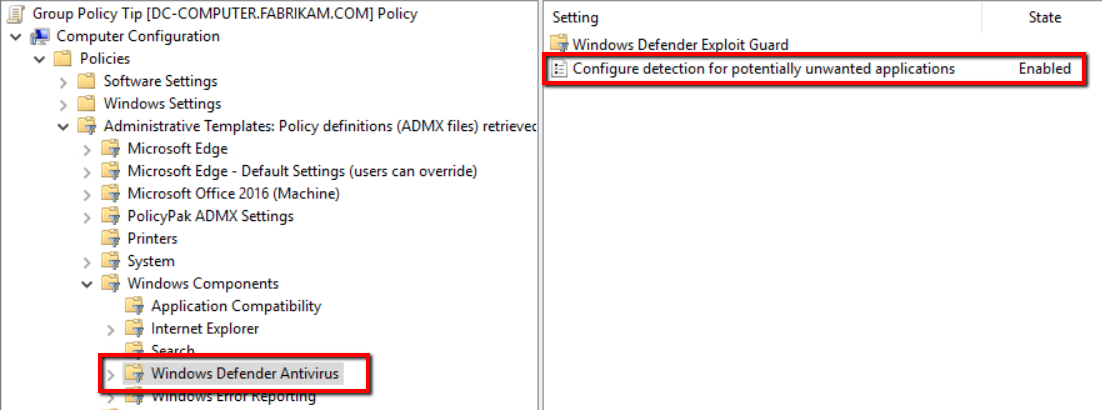
Then choose which your desired option:
You can also use Configuration Manager to deploy the setting as well.
05:07
Enabling PUA with Microsoft Endpoint Manager (Intune)
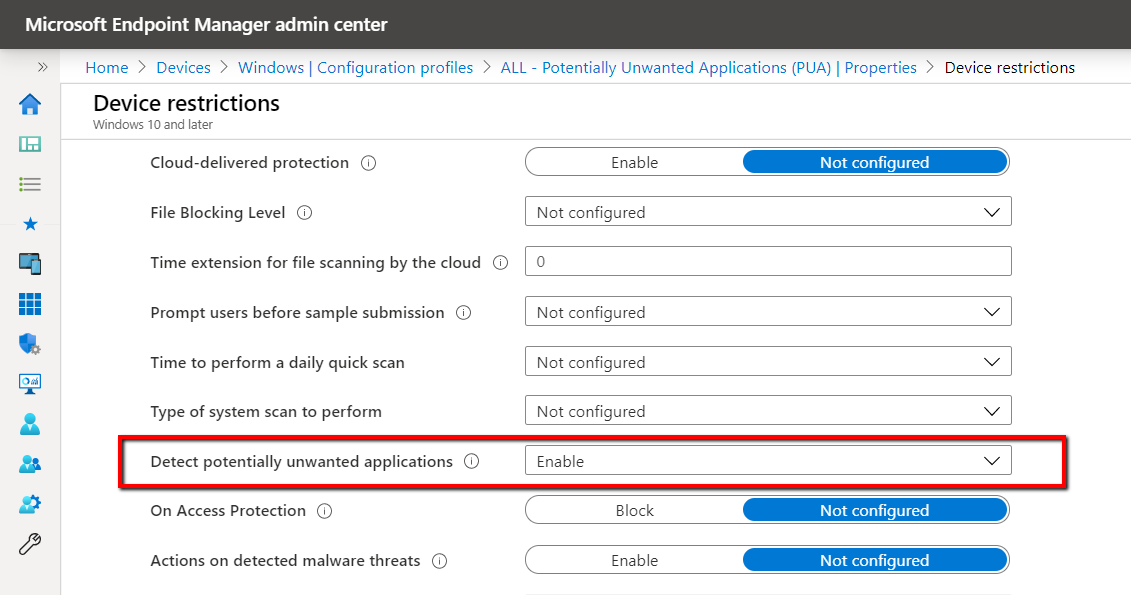
You can configure the Defender/PUA Protection CSP for your Intune enrolled devices. You can either create a configuration profile or use the preferred method of enabling and configuring a security baseline. To create a configuration profile choose Windows 10 as the platform and Device restrictions as the profile type.
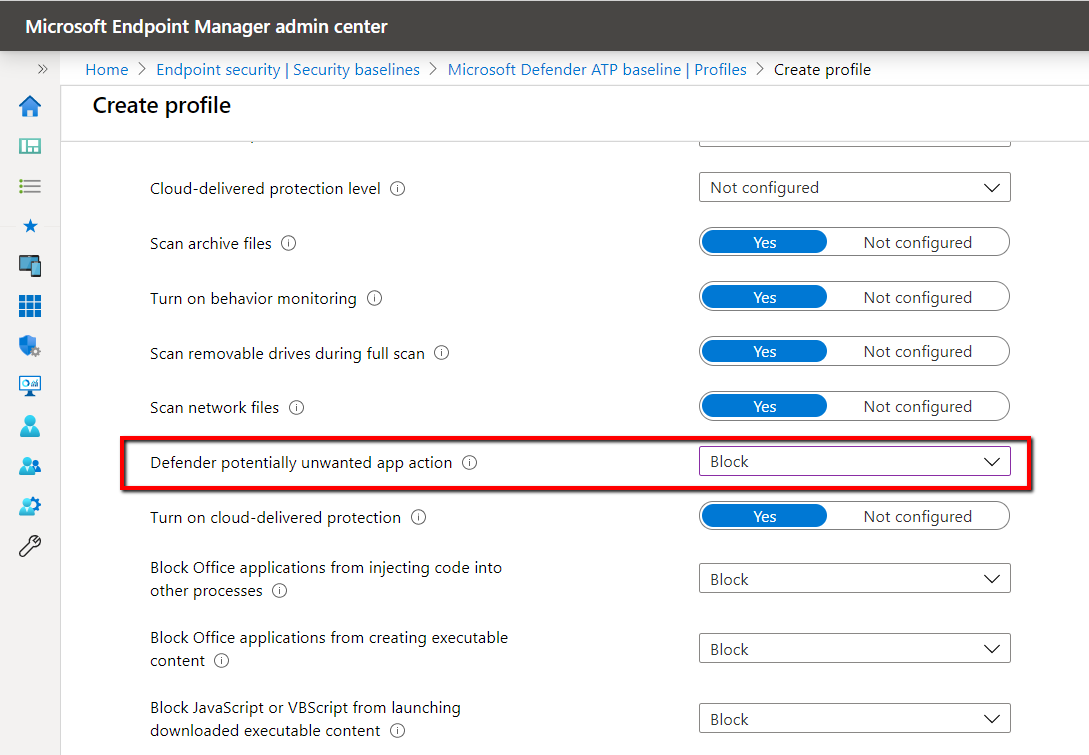
To deploy PUA using a security baseline, go to Endpoint Security > Security Baselines > Microsoft Defender ATP baseline > Profile configure the “Defender potentially unwanted app action” setting as is shown below.
Enable PUA in Chromium-based Microsoft Edge
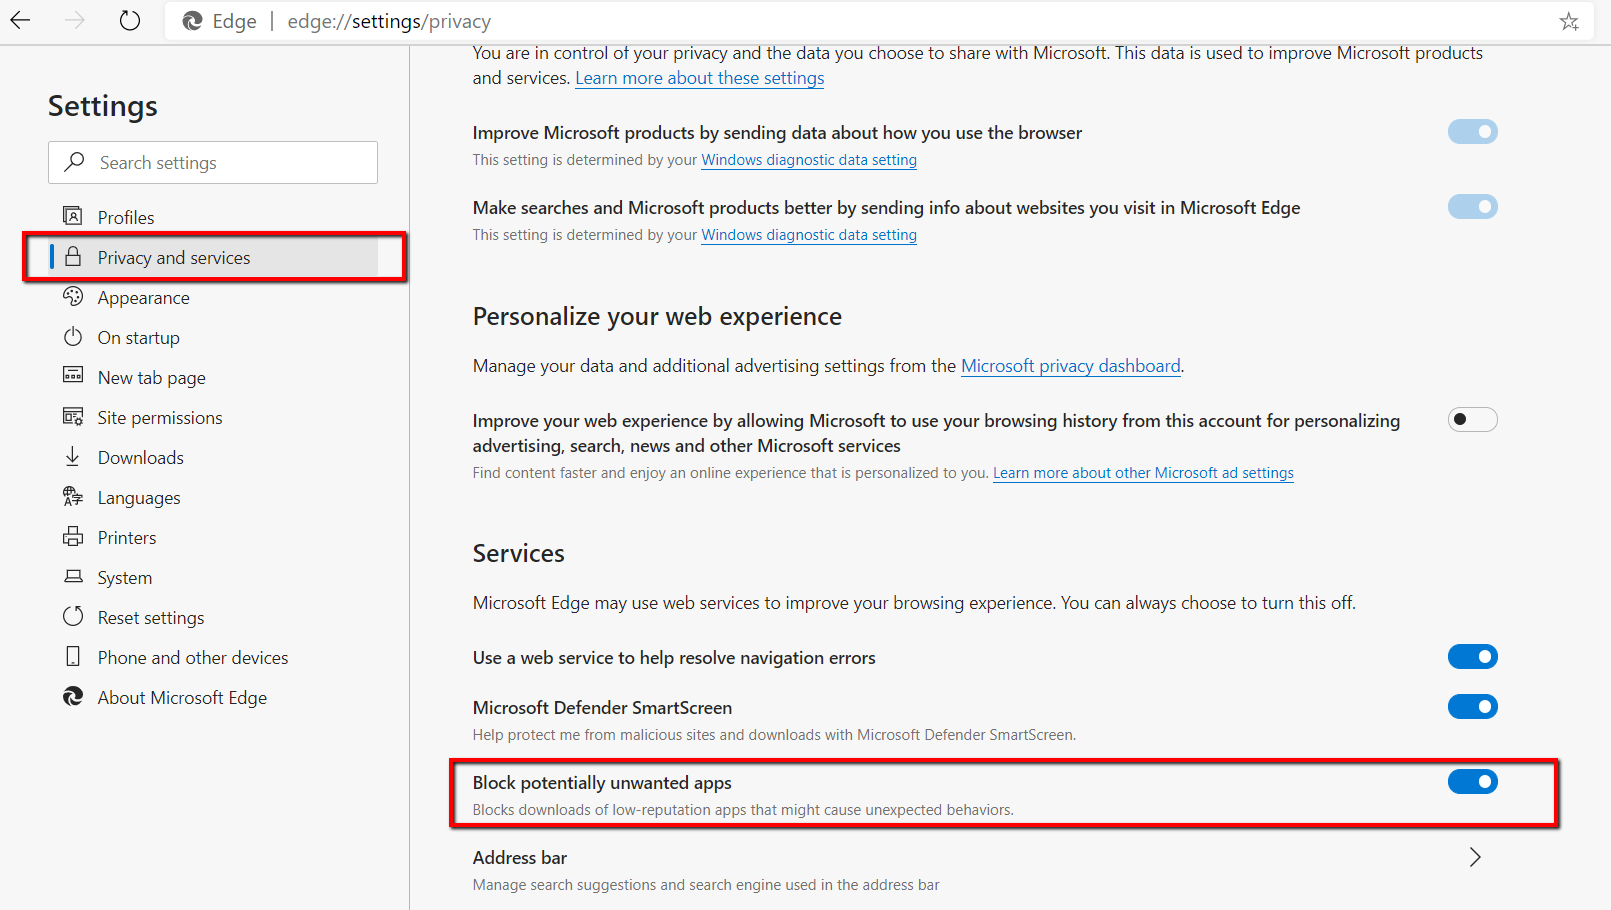
The new Edge browser (version 80 and greater) contains its own PUA protection ability. Go to your browser settings and select Privacy and services. Then enable the “Block potentially unwarned apps” as is shown in the screenshot below.
You can also deploy this Edge setting using Group Policy as well. Simply create a GPO and go to Computer Configuration > Administrative Templates > Microsoft Edge > SmartScreen settings and enable “Configure Microsoft Defender SmartScreen to block potentially unwanted apps.”

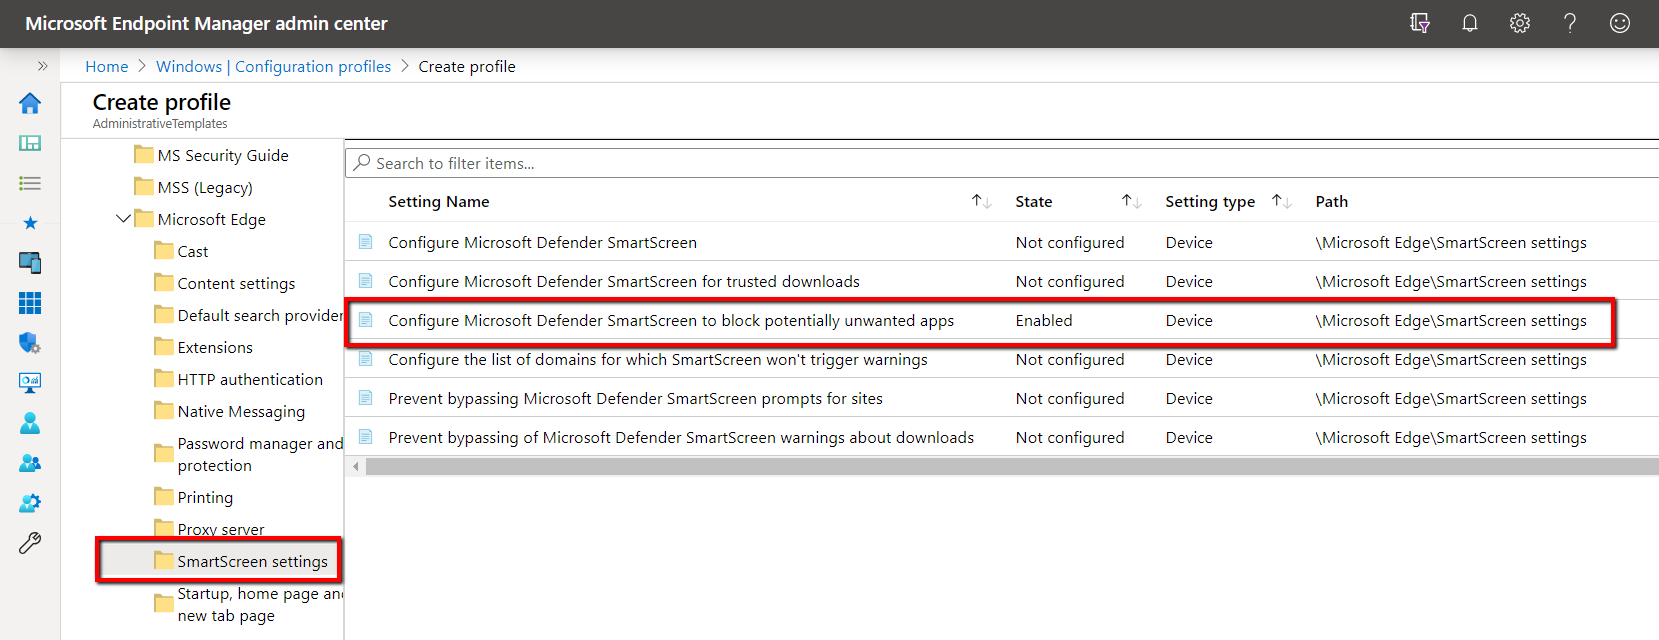
To enable the same setting using Microsoft Endpoint Manager, create a configuration profile and choose Windows 10 as the platform and Administrative Templates as the profile type. Then go to Microsoft Edge > SmartScreen Settings and enable “Configure Microsoft Defender SmartScreen to block potentially unwanted apps."
You should enable these PUA tools as a part of your multilayer security strategy. Hardening your desktop devices and reducing their attack surface exposure is critically important. Another way to stop PUA (or, really any unwanted file download) is application control via PolicyPak Least Privilege Manager. You can check it out here.

Comments (0)