

Configure Intune or Group Policy Audit Policies for Microsoft Defender for Identity
Microsoft Defender for Identity (formerly known as Azure Advanced Threat Protection or Azure ATP) is a cloud-based security service offered by Microsoft to help protect your on-prem Active Directory environment. It leverages artificial intelligence, network, and behavioral analytics to detect abnormal behavior and activities that could be potentially threatening. It can then provide security alerts and actionable insights to protect against cyber threats targeting identities and credentials. Some of its capabilities include the following:
- Analyze user behaviors and activities with learning-driven metrics
- Safeguard user identities and credentials within Active Directory
- Identify and investigate abnormal user behaviors and advanced threat patterns
- Provide incident details on a streamlined timeline for efficient resolution.
Requirements for Microsoft Defender for Identity
To use Microsoft Defender for Identity you will need a license for Enterprise Mobility + Security E5 (EMS E5/A5), Microsoft 365 E5 (M365 E5/A5/G5) or Microsoft 365 E5/A5/G5. Standalone Defender for Identity licenses are also available. You will also need an Azure AD tenant with at least one global/security administrator with a Directory Service account with read access to all objects in the monitored domains.
In this article I am only going to cover how to configure your on-prem Group Policy and AD environment for audit events. You can refer to this installation guide as to how to install Microsoft Defender for Identity on Active Directory or Active Directory Federation Services (AD FS) servers.
Configuring Group Policy
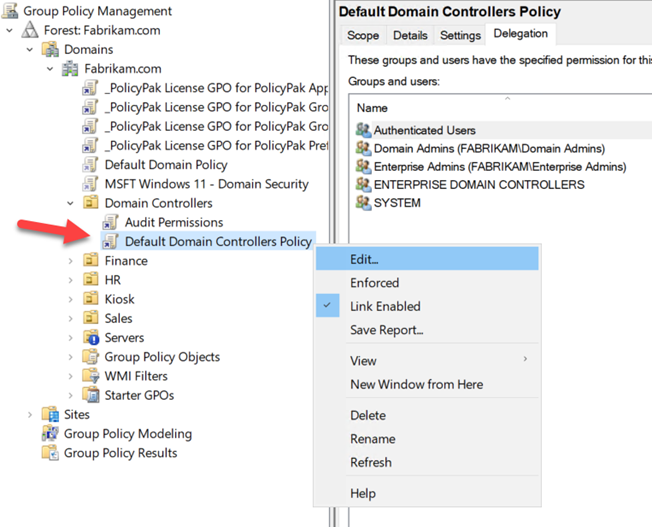
For Microsoft Defender for Identity to fully function, you must enable and configure certain audit events in Group Policy. Microsoft Defender for Identity then uses this audit data to detect suspicious activities and security vulnerabilities in real-time. To configure the audit events, you need use Group Policy Management Editor to either create a new GPO and link it to the Domain Controllers OU or edit and configure the Default Domain Controllers Policy. In the example below I am choosing to modify the existing policy.
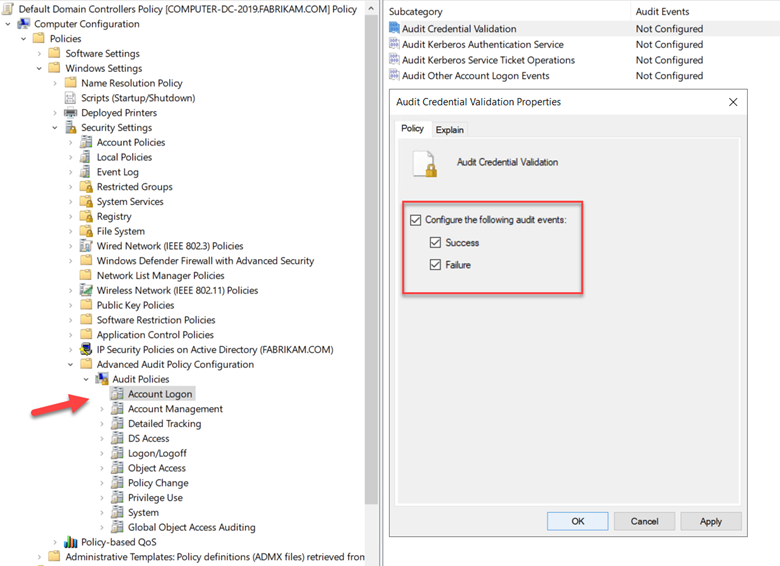
Start by going navigating to Computer Configuration > Policies > Windows Settings > Security Settings > Advanced Audit Policy Configuration > Audit Policies. Start with the Account Logon policy and select “Audit Credential Validation.” Configure this and all the following audit events for both Success and Failure events as shown in the screenshot below. This will trigger Event ID 4776 in the security logs in Event Viewer.
Next will be the Account Management audit policy where you will enable the following subcategories for both Success and Failure.
|
Audit Computer Account Management |
Event IDs 4741, 4743 |
|
Audit Distribution Group Management |
Event IDs 4753, 4763 |
|
Audit Security Group Management |
Event IDs 4728, 4729, 4730, 4732, 4733, 4756, 4757, 4758 |
|
Audit User Account Management |
4726 * |
Then move to the DS Access audit policy and enable “Audit Directory Service Access” for Event ID 4662 and then enable “Audit Directory Service Changes” for Event ID 5136. Wrap things up by moving on to the System audit policy and enable “Audit Directory Service Changes” audit for Event ID 5136.
Configure Object Auditing
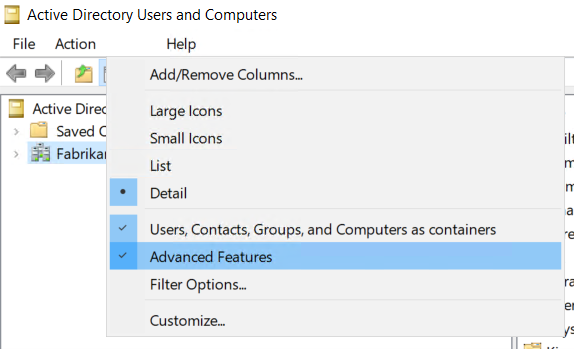
Note that to collect 4662 events you will need to configure object auditing on the user, group, and computer objects. This is performed using Active Directory Users and Computers. Make sure you select the View menu and select Advanced Features as shown below.
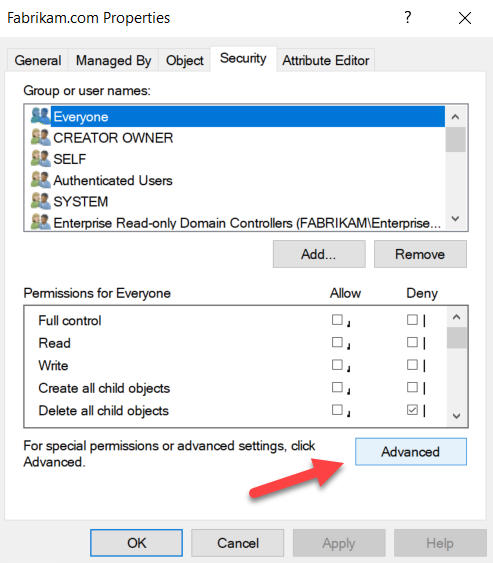
Then right click on your domain, select Advanced Features > go to the Security Tab and click Advanced as shown here.
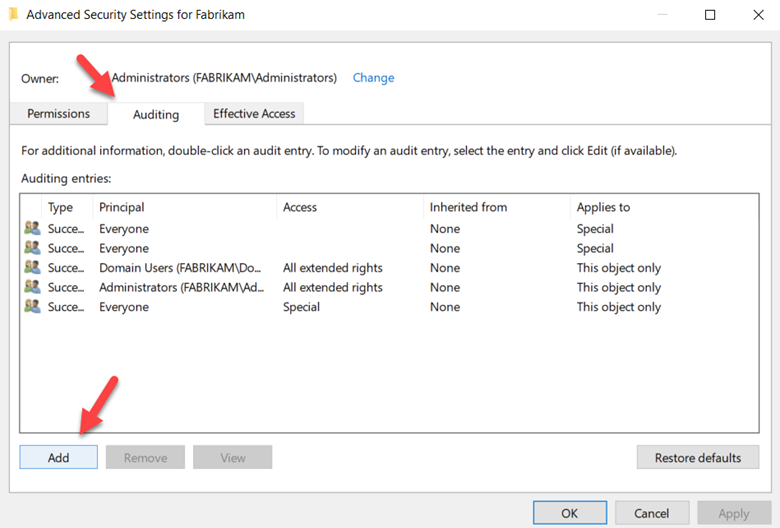
In Advanced Security Settings> choose the Auditing tab and Select Add.
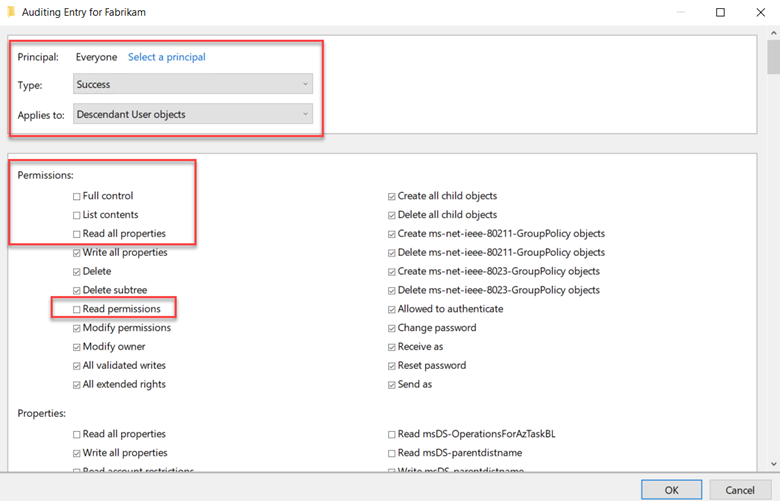
Select Everyone as the principal. Upon returning to the Auditing Entry, configure these settings:
Choose "Success" for the 'Type'.
For 'Applies to', opt for 'Descendant User objects'.
In the Permissions section, navigate downwards and click the 'Clear all' button.
Now scroll up and choose "Full Control," which will auto-select all permissions. Next, deselect "List contents," "Read all properties," and "Read permissions." Click OK. This action sets the Properties to "Write" mode. As a result, any pertinent changes to the directory services will register as 4662 events. The final configuration is shown below.
Now complete the same steps but select the following object types for Applies to:
-
- Descendant Group Objects
- Descendant Computer Objects
- Descendant msDS-GroupManagedServiceAccount Objects
- Descendant msDS-ManagedServiceAccount Objects
Enable auditing on an ADFS object
In the steps above we configured auditing for the entire Domain. Some detections only require auditing in specific Active Directory objects however. Return to the Active Directory Users and Computers console, and choose the domain you want to enable the logs on.
- Navigate to Program Data > Microsoft > ADFS.
- Right-click on ADFS and choose Properties.
- Navigate to the Security tab and click on Advanced.
- Within Advanced Security Settings, go to the Auditing tab and click Add.
- Click on 'Select a principal'.
- In the field labeled 'Enter the object name to select', input 'Everyone'. Click 'Check Names', and then click OK.
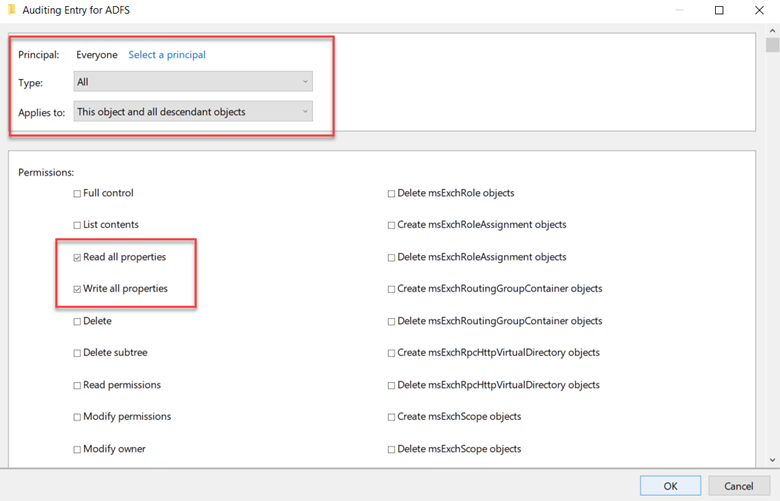
- You'll be taken back to the Auditing Entry. Configure the following settings:
- For 'Type', choose 'All'.
- For 'Applies to', pick 'This object and all descendant objects'.
- In the Permissions section, first click 'Clear all'. Then select 'Read all properties' and 'Write all properties'.
Click OK out of all windows.
Enable auditing on the Configuration container
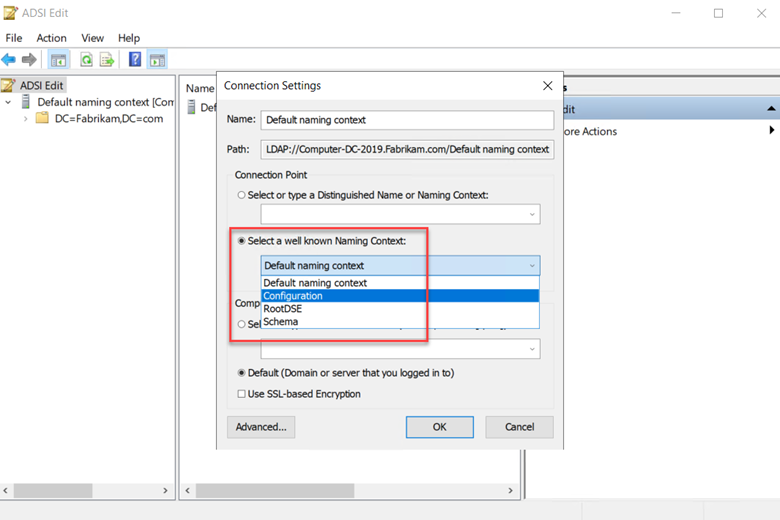
We just have one more step to go and here you will need to launch the ADSI Edit consol which you can access by typine ADSIEdit.msc in the Run Command.
- From the Action menu, choose Connect to.
- In the Connection Settings pop-up, from the 'Select a well known Naming Context' dropdown, choose Configuration, and then click OK.
- Navigate to the Configuration container and expand it. Inside, you'll find the Configuration node, which starts with "CN=Configuration,DC=..."
- Right-click on this Configuration node and choose Properties as shown below.
- Now navigate to the Security tab and click "Advanced."
- Once inside Advanced Security Settings, opt for the Auditing tab and click "Add."
- Click on "Select a principal."
- In the ensuing field, input "Everyone", then click "Check Names", followed by "OK."
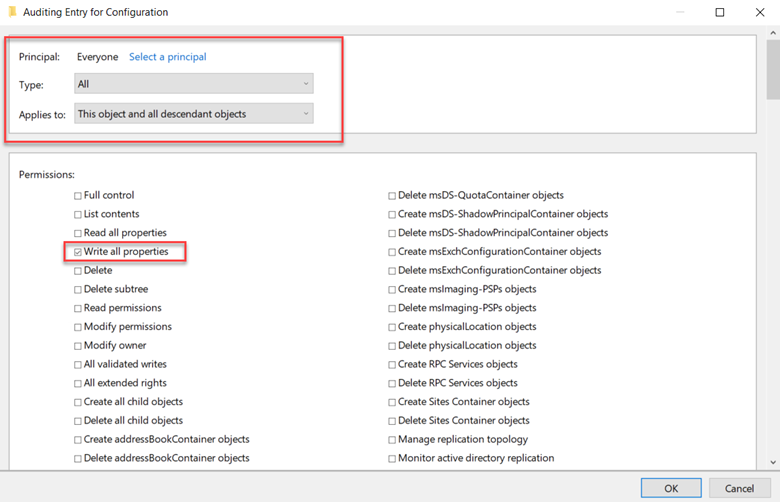
Now, back in the Auditing Entry, adjust these settings:
- Set 'Type' to 'All'.
- Under 'Applies to', choose 'This object and all descendant objects'.
- Within Permissions, first hit 'Clear all', then check 'Write all properties' as shown in the example below.
Click OK out of all windows and you are done.

Comments (0)