

3 Ways to Enable/Disable LSA on Windows 10 and 11
Microsoft introduced a process called Local Security Authority (LSA) a while back for Windows 8.1. LSA performs security related tasks such as the verification of logon attempts and password changes. It also creates access tokens, enforces local security policies, and protects and adds security protection for stored credentials. With the growing threat landscape out there, it’s a good thing to enable for your Windows desktops and servers.
The good news is that LSA protection is enabled by default for devices running Windows 11, 22H2 that meet the following conditions:
- Windows 11, 22H2 was newly installed on the device and not upgraded from a previous release
- The device is enterprise joined be it AD domain joined, Azure AD domain joined or a hybrid configuration.
While Microsoft advocates enabling LSA across your enterprise, they recommend that you first identify all LSA plug-ins and drivers that are in use within your organization and ensure that they are digitally signed with a Microsoft certificate and perform as expected. You can refer to this document for more information.
As of right now, there is no way to enable/disable LSA using Intune. Your three available management options for now are Windows Security, the registry, and Group Policy.
Enabling LSA on a Local Device
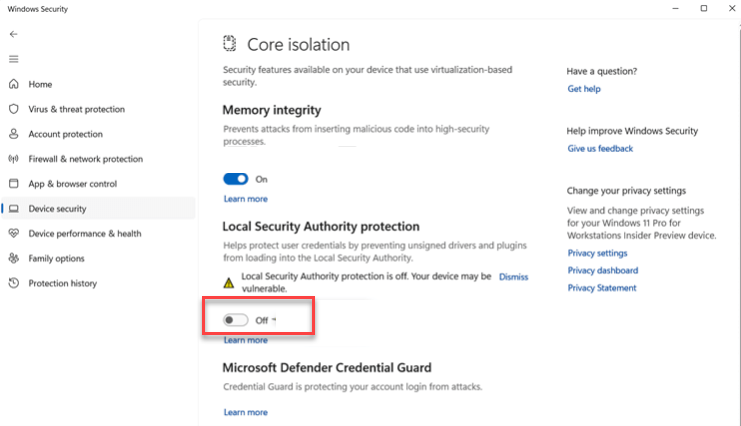
If you just have a few computers to manage, you can enable them locally on the desktops themselves by going to Windows Security > Device security > Core isolation details and enable the toggle under the Local Security Authority protection section. In the screenshot below, LSA is currently disabled.
Registry
You can manage LSA through the registry, either using the local registry editor or a GPO using Group Policy Preferences. The required key path is as follows:
SOFTWARE\Microsoft\Windows NT\CurrentVersion\Image File Execution Options\LSASS.exe.
If you want to enable LSA using Auditing mode, click on the LSA key and create a value called AuditLevel. Select REG_DWORD as the value type and type 00000008 in the value data box. This is a good option to identify LSA plug-ins and drivers that will fail to load in LSA Protection mode.
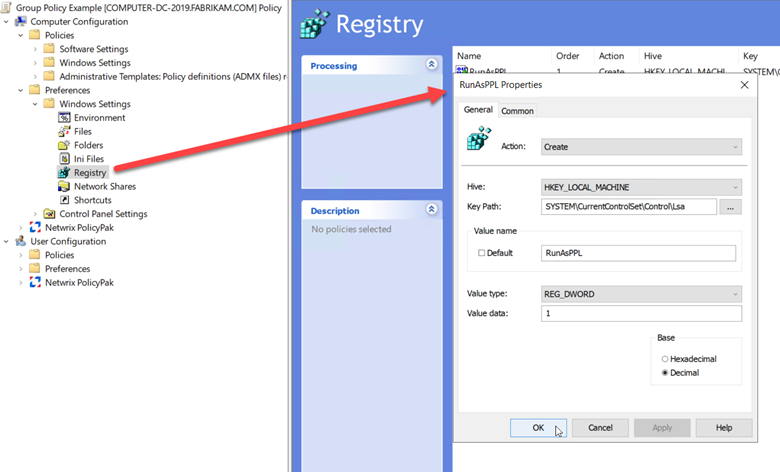
To fully enable LSA, create a value key called RunAsPPL, choose REG_DWORD and type 00000001 as shown in the screenshot below.

You can create a GPO and use Group Policy Preferences to push out these registry values. Go to Computer Configuration > Preferences > Registry > right click and choose “New registry item” and input the required values as shown below.
Group Policy ADMX
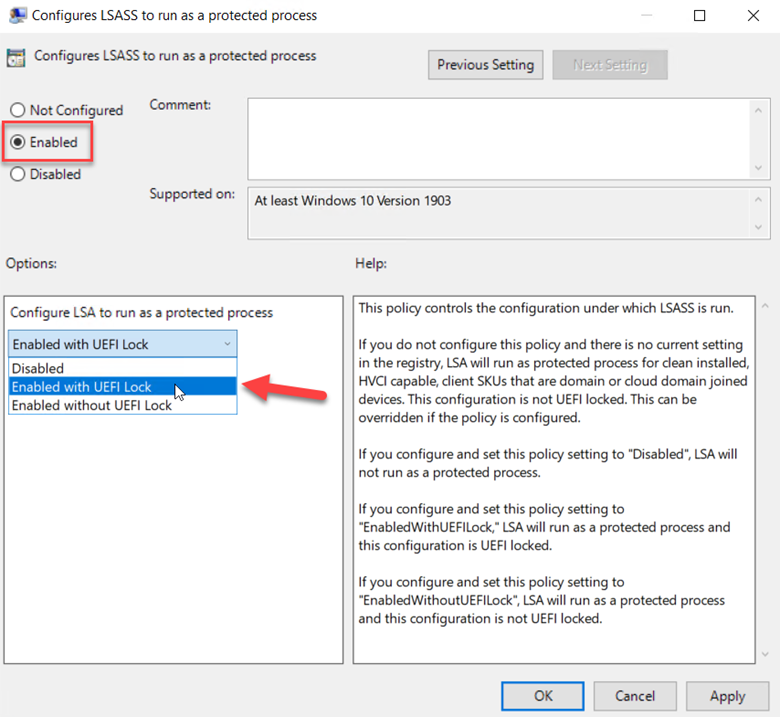
You can enable/disable LSA using Group Policy as well. In Group Policy Management Editor go to Computer Configuration > Administrative Templates > System > Local Security Authority. The setting you want is “Configure LSASS to run as a protected process.” In the screenshot below you will notice a down arrow beside the setting title. The down arrow indicates that the setting is a preference setting and not stored in the typical group policy location in the registry.

Group Policy ADMX
You can enable/disable LSA using Group Policy as well. In Group Policy Management Editor go to Computer Configuration > Administrative Templates > System > Local Security Authority. The setting you want is “Configure LSASS to run as a protected process.” In the screenshot below you will notice a down arrow beside the setting title. The down arrow indicates that the setting is a preference setting and not stored in the typical group policy location in the registry.
Conclusion
Hackers are constantly trying to subvert the Windows logon process which is why you need to protect it from hackers as much as possible. LSA is a great out-of-the-box utility to help you achieve that.

Comments (0)